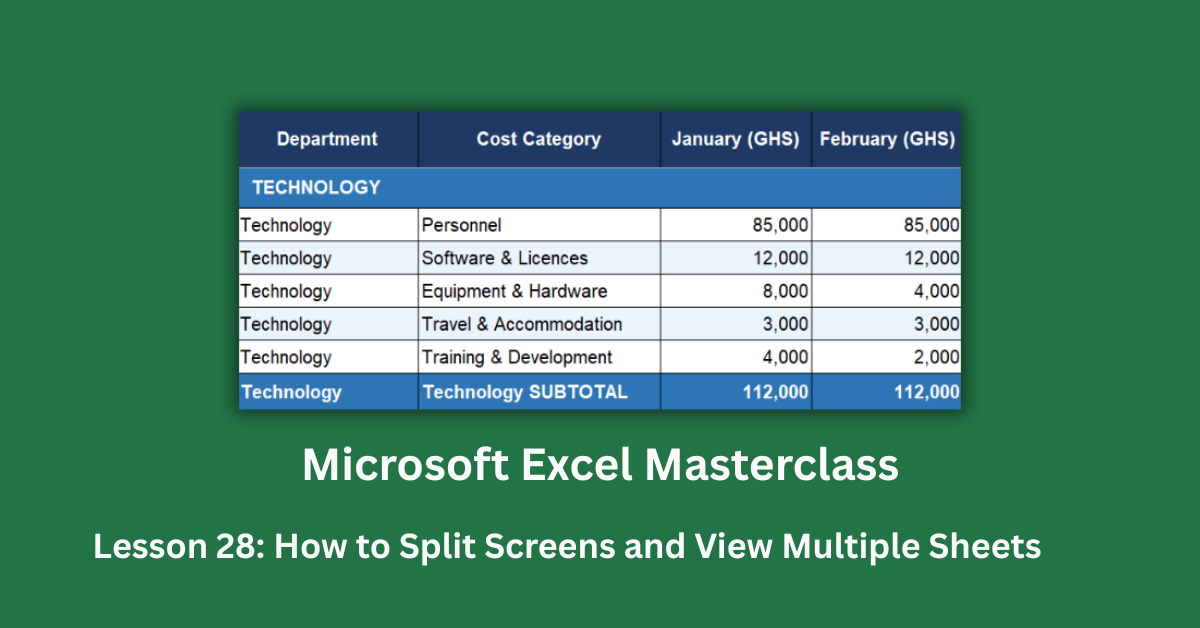
Comparing a budget sheet to an actuals sheet in Excel, the old way, means clicking back and forth between tabs trying to hold numbers in your head. The NexaCorp Q1 2024 budget workbook used throughout this guide has five sheets: budget, actuals, variance analysis, a summary dashboard, and an error reference. The total Q1 budget was GHS 1,394,500. Actual spend came in at GHS 1,425,500 — a GHS 31,000 overspend. Marketing’s travel category alone ran GHS 13,900 over budget. Spotting that kind of pattern while toggling between tabs is genuinely difficult. It doesn’t have to be.
Knowing how to split screens and view multiple sheets in Excel turns that frustrating back-and-forth into a side-by-side comparison where patterns jump out immediately. This guide covers four distinct tools: the Split view for comparing two sections of the same sheet, New Window with Arrange All for placing two sheets side by side, View Side by Side for synchronised row-by-row comparison, and sheet tab navigation shortcuts for moving quickly across a multi-sheet workbook. All four features are available in Excel 2016 and all later versions, including Excel 2019, Excel 2021, and Microsoft 365. View Side by Side and Arrange All are also available in Excel for the web, though with some limitations on window management.
Quick Takeaways:
- Split view divides one sheet into two scrollable panels. It does NOT lock headers like Freeze Panes does — it’s for comparing two distant sections of the same sheet.
- New Window opens a second view of the same workbook, not a copy. Changes in either window apply to the same file instantly. Use it before Arrange All.
- Ctrl+clicking sheet tabs activates Group mode, not multi-sheet view. In Group mode, every edit applies to all selected sheets simultaneously. Exit it immediately if triggered accidentally.
- Window arrangement does not save with the file. Re-create it each session, or save it as a Custom View (View > Custom Views > Add).
- Ctrl+PageDown and Ctrl+PageUp are the fastest way to cycle through sheets when the tab bar is crowded.
When to Use Split View vs. Other Tools
What Split view actually does
Split divides the current sheet into two or four independently scrollable panels. Think of it as cutting the sheet horizontally, vertically, or both — each section can scroll to different rows or columns without affecting the others.
In the NexaCorp Variance Analysis sheet, which runs 40 rows across 9 columns, a horizontal split lets you keep the Technology and Finance sections visible in the top panel while scrolling through Marketing, HR, Operations, and Legal in the bottom panel. That’s the right use case: one sheet, two distant sections, need to see both.
What split does NOT do is lock any region in place. If you scroll the top panel, the headers can disappear there too. For fixed headers, Freeze Panes is the right tool — not split.
Applying a split correctly
Click the cell where you want the split line to appear above and to the left. For the Variance Analysis sheet, clicking A20 and then going to View > Split creates a horizontal split roughly halfway down the 40-row sheet. Both panels are large enough to navigate.
The most common mistake is clicking a cell too close to the top (like A2), leaving a top panel just one row tall that serves no purpose. If that happens, drag the split bar down to a more useful position, or remove the split entirely by double-clicking the split bar and reapplying it from a better starting cell.
To remove a split: View > Split again (it toggles). Or double-click the split bar directly on the sheet.
How to View Two Sheets Side by Side in Excel
Open a New Window first
This is the step most people skip, and it’s why “Arrange All” seems to do nothing. Before you can place two sheets side by side, you need two windows open showing the same workbook.
Go to View > New Window. A second window opens, titled something like NexaCorp_Budget.xlsx:2. Your original window becomes :1. Both windows show the same file — they are not copies. Navigate to Q1_Budget in one window and Q1_Actuals in the other.
Arrange the windows side by side
With both windows open, go to View > Arrange All. Choose Vertical to place them side by side (best for wide sheets with many columns) or Horizontal for top-bottom comparison. Tick “Windows of active workbook” to ensure only your budget file’s windows are arranged, not everything else open on your screen. Click OK.
Now you can scroll the Budget sheet on the left and compare it line by line to the Actuals sheet on the right. In the NexaCorp dataset, this immediately reveals that Operations’ Equipment & Hardware spend of GHS 43,600 in January alone was way ahead of the GHS 15,000 monthly budget — a purchase brought forward that looks alarming without context.
Use View Side by Side for synchronised scrolling
Once two windows are arranged, you can enable View > View Side by Side. This locks both windows into synchronised scrolling: moving down in one window moves both down at exactly the same rate. For comparing budget rows to actual rows where the structure is identical, this is extremely useful.
One thing to watch: if the two sheets are scrolled to different positions before you enable View Side by Side, the sync may start misaligned. Click Reset Window Position (in the View tab, visible when Side by Side is active) to snap both windows back to the same starting position. If synchronisation gets knocked out of alignment during scrolling, click Synchronous Scrolling to toggle it off and back on.
Navigating Multiple Sheets Efficiently
Sheet tab shortcuts that save real time
The NexaCorp workbook has five sheets. With long tab names like Variance_Analysis and Summary_Dashboard, the tab bar fills up fast. If you can only see two tabs and need to get to the third, most people click the tiny arrow buttons at the bottom left.
There are faster ways. Ctrl+PageDown moves to the next sheet to the right. Ctrl+PageUp moves to the previous sheet. Hold the key to cycle quickly through all sheets. If you need to jump to a specific sheet by name, right-click either arrow button at the bottom left of the tab bar. A full list of all sheet names appears. Click the one you need.
The Ctrl+click trap to avoid
Here is something that catches people out regularly. Ctrl+clicking a sheet tab does not open it in a new window or view. It enables Group mode, where both tabs turn white and a [Group] label appears in the Excel title bar. In Group mode, any data you type or any formatting you apply goes to every grouped sheet simultaneously.
If you accidentally enter Group mode, exit immediately: right-click any sheet tab and choose Ungroup Sheets, or click any ungrouped tab. Never type data while [Group] is showing in the title bar unless you specifically intend to write to multiple sheets at once. It’s one of the easiest ways to overwrite data across an entire workbook in seconds.
Window arrangement doesn’t save — here’s the workaround
After spending time setting up a perfect side-by-side view of Budget and Actuals, saving the file, and reopening it the next morning, the arrangement is gone. Excel returns to single-window view. This is expected behaviour — window layout is not stored in the file itself.
The workaround is Custom Views. With your arrangement in place, go to View > Custom Views > Add, name the view something like “Budget vs Actuals”, and click OK. Next session, go to View > Custom Views, select your saved view, and click Show. The window layout, zoom level, freeze pane position, and scroll location all restore. You’ll still need to manually navigate each window to the correct sheet, but that’s five seconds rather than five minutes.
Putting the Right Tool with the Right Task
The NexaCorp workbook demonstrates all four scenarios clearly. The Variance Analysis sheet with 40 rows is where Split view earns its place — comparing Technology’s GHS 17,100 adverse variance at the top to HR’s GHS 11,800 favourable variance further down, without losing context. The Budget and Actuals sheets with identical structures are where New Window plus Arrange All pays off — spotting that Marketing’s travel overspend of GHS 13,900 in Q1 (against a budget of GHS 26,000) only becomes obvious when both sheets are visible at the same time.
The Summary Dashboard pulls cross-sheet formulas from both the Budget and Actuals sheets. When building those formulas, having both source sheets visible in arranged windows means you click the source cell directly instead of typing sheet names by memory — and avoids the broken reference errors that come from misspelling a sheet name.
Start with the task. Need to compare two sections of one sheet? Split. Need two separate sheets side by side? New Window, then Arrange All. Need to scroll both sheets together row by row? Add View Side by Side. Need to jump between five sheets quickly? Ctrl+PageDown.